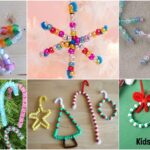

We love spring crafts in our house, and with Mother’s Day just around the corner, there’s nothing more timely than a lovely handmade gift! These cute keepsake crafts are super quick and easy to make.
But, I have to warn you, once you make one of them, you will want to make at least a dozen!
DIY Mother’s Day Photo Frames with Popsicle Sticks
Flower Frame With Craft Stick

Image Source/Tutorial: Fun Learning Life
This project is such a charming idea for kids from about 6 to 10 years old. Start by gluing craft sticks side-by-side, leaving even gaps to get that classic picket fence look. Next, cut out some circles from a photo.
You’ll make flowers from foam sheets and attach green fuzzy sticks to the back. Glue the photo circles right into the middle of your foam flowers.
To finish it up, take a pipe cleaner and loop it through the back of the picket fence. Then you can twist the fuzzy stick stems through the fence’s sticks. How cute is that?
Colorful Craft Sticks Sign For Mom

Image Source/Tutorial: Craft Project Ideas
I just love this colorful sign because it’s such a sweet way to show Mom how much you care. It’s a great activity for both pre-primary and lower primary kiddos.
All you have to do is write down all the reasons you love your mom on different colorful craft sticks using a marker. Once you have all your messages written, connect the sticks together and glue a thread to both sides on the back of the sign for hanging.
Glue the ends of the thread together, and your awesome sign is all done!
Easy Popsicle Stick Frame

Image Source/Tutorial: East Coast Mommy
Everyone loves seeing a handmade craft hanging up on the wall! This popsicle stick frame is super simple to put together and is just right for a lower primary aged child.
To make one, you just need some paint, popsicle sticks, and a handful of buttons. Paint four sticks in your favorite color and then glue them together into a square.
Add a cute button to each corner of the square. Then, paste a yellow card to the back of the frame and glue more buttons on the card to make a heart shape. Easy peasy!
Magnetic Photo Frame Craft

Image Source/Tutorial: 5 Minutes For Mom
Here’s a totally adorable photo frame for your mom! This activity is fantastic for kids between 5 and 10. First, paint the surface of all your popsicle sticks.
Attach two sticks to form an “L” shape, then add the other sticks to finish the frame. Use cotton swabs to paint fun polka dots all over it. Next, glue some decorative flower pieces onto the corners.
Cut out two small pieces from a magnetic sheet and stick them on the back of the frame. The final touch is gluing a photo right in the center.
Hanging Photo Frame Craft for Mom

Image Source/Tutorial: Crafting Hours
This craft is perfect for kids from 6 to 10 years old. Start by gluing popsicle sticks side-by-side into sets of two. Then, glue single sticks across the ends of these sets.
Make another square on top of this frame and paint the whole thing red. You’ll need to make four of these frames. Grab a string, fold it in half, and tie a knot at the bottom, leaving two ends.
Glue this string to the frames, leaving some distance between them. Decorate the edges with buttons, pearls, or anything else you like! Finally, slide some OHP sheets inside the frame and then slide in your photos.
Colorful Picture Frame With Popsicle Sticks

Image Source/Tutorial: Little Learning Corner
This colorful picture frame is so bright and cheerful! Pre-schoolers can definitely make this with a little bit of help. First, glue colorful sticks side by side, and then place two sticks across them in the opposite direction to support the frame.
Put some magnetic tape on those two support sticks. Next, glue a mini clip right in the top center of the frame. Put a picture in the clip and then have fun decorating the frame with buttons. Your amazing picture frame is ready to go!
Picture Frame Craft Idea Using Popsicle Sticks

Image Source/Tutorial: Globe Studio One
Let’s make an awesome picture frame! Take two small and two normal-sized craft sticks and glue them together to make an “M” shape. Then, paste five sticks in a zig-zag pattern, leaving a gap the thickness of one stick between them.
Add two more sticks at the bottom to create a base. Place your “M” between the gaps. Make two more bases just like this. On a small stick, glue two normal-sized sticks that have been cut by 1/4 of their length.
Make two of these and bind them by gluing four other craft sticks on. Paint the frame, the M, and the bases. Paste the picture on the back of the frame using more craft sticks. Finally, put all three bases together and place the frame in the middle with the M on each side.
Mother’s Day Frame Craft With Popsicle Stick
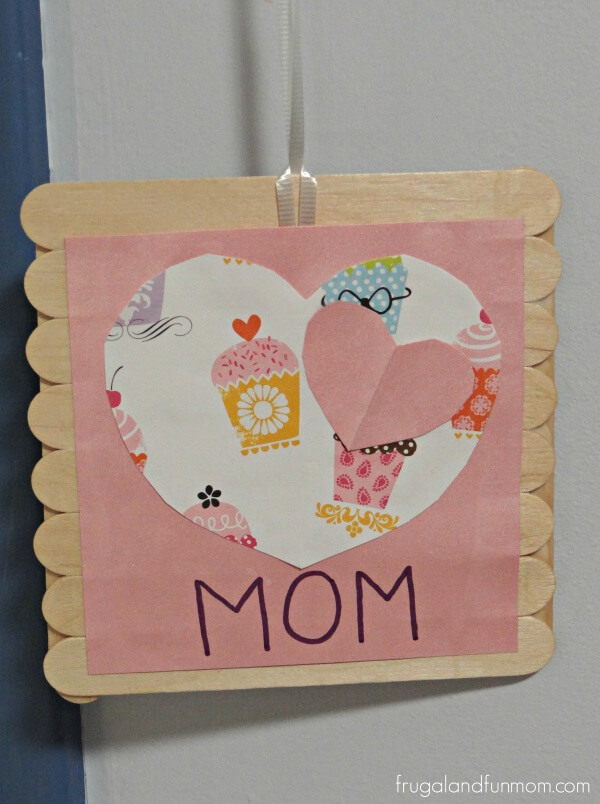
Image Source/Tutorial: Fun Learning Life
A popsicle stick frame and some cardstock come together to make such a cute little gift for Mom. A lower primary kid can make this one without any trouble.
Here’s how you do it: Loop a 16-inch piece of ribbon around the top popsicle stick. Then, place two popsicle sticks side by side. Glue the stick with the ribbon at the top of each end, and then add seven more sticks.
Next, cut out a 5-inch piece of cardstock paper and paste it onto the frame. Cut out a few hearts and stick them on the cardstock. Write your special message with a marker.
DIY Miscellaneous Mother’s Day Crafts
Napkin Holder Craft Idea For Mother’s Day

Image Source/Tutorial: My Joy-Filled Life
A gift that shows your love and is also useful for your mom is one of the best kinds! To make this, take 12 sticks and lay them right next to each other.
Now, attach one craft stick across them about a quarter of an inch from the top, and another one near the bottom. Cut six sticks in half and make another, smaller frame.
Decorate the panels using different colorful washi tapes. Next, make a rectangle by gluing the smaller and larger frames together. Glue a craft stick to the outside of the side panels at the bottom.
Apply some letter stickers to write out a nice phrase.
Personalized Scrapbook Page For Mom

Image Source/Tutorial: Things To Share And Remember
This personalized scrapbook paper is not only easy to make but will also give a really unique touch to your gift. Take a piece of white paper and make your baby’s handprint on it, then carefully cut the handprints out.
Grab some colorful popsicle sticks and glue them on both sides of the top of the scrapbook paper to make two “M” shapes. Take a photo, cut it into an “O” shape, and glue it on top of both Ms. Stick the handprint cutouts at the bottom of the page, and place a poem or phrase in the middle of the handprints.
DIY Canvas With Craft Stick

Image Source/Tutorial: Passionate Moms
Take a piece of construction paper and paste popsicle sticks right next to each other on it. Now it’s time to paint the popsicle canvas!
While that dries, cut the tiny compartments from an egg carton and shape them into small flowers by cutting little incisions toward the base. Then, glue buttons in the center to make them look even more appealing.
For the flower pot and the sun, trace and cut out the shapes from construction paper. Now for the fun part, decorating the canvas! Glue the egg carton flowers at the top. Use a chenille stem for the branches and leaves.
At the bottom of the branches, paste the pot and add the sun at the top. Use a black marker to write a love note to your mom. That’s it!
Handmade Photo Frame & Stenciled Desk Set Craft

Image Source/Tutorial: Suzy’s Sitcom
This one is so cool but kids will need some adult help to finish it. Lift the stencil and line up a craft stick so a row of patterns is centered on it. Sprinkle glitter onto the stencil.
You’ll need two different glitters and 12 craft sticks of each color. Line up four sticks, two plain and two decorative, and place a photo in the middle. Overlap the plain ones about a quarter of an inch over the photo.
Glue two decorated sticks perpendicularly and two more decorated sticks above the plain ones. For the pen holder, glue decorated sticks all around a can and add ribbons to both the frame and the holder.
To make a base, glue three plain sticks side by side with one decorative stick on top, leaving a small gap.
Homemade Popsicle Stick Card for Mother’s Day

Image Source/Tutorial: Glued To My Crafts Blog
If Mother’s Day is right around the corner and you’re short on time, this gift is a lifesaver. It’s perfect for pre-schoolers and is super quick. Make two “M” shapes from popsicle sticks and glue them on the sides of a piece of cardstock paper.
On another sheet, trace the baby’s hand and cut it out. Now, glue the handprint in the center between the two Ms. Add a red foam heart to the middle of the hand and decorate the sheet with other heart-shaped stickers. Ta-da! Your card is all done.
Handcrafted Frames for Mother’s Day

A classic popsicle stick frame always makes a great gift for Mom! Here’s how you can make one. Paint the popsicle sticks any color you like. Glue down four sets of two popsicle sticks side by side.
Now, place two sets on the bottom and paste the other two sets on top, overlapping the bottom ones. Stick your image, picture, or artwork to the back of the frame.
Decorate the frame by gluing on rhinestones, buttons, or pearls.
DIY Popsicle Stick Cards for Mom
Sweet Home Card

This card is such a sweet idea and it’s perfect for pre-schoolers to make. My own little ones had a blast with this one! You’ll need construction paper, buttons, popsicle sticks, markers, and glue.
Just glue the popsicle sticks onto a sheet of paper in the shape of a house. Cut a heart from another sheet and paste it inside the house.
Then, glue buttons around the popsicle sticks and write your favorite message with a marker. And that’s it!
Folding Popsicle Stick Card

Image Source/Tutorial: Baker Ross
Perfect for the lower primary age group, this card adds a really cool and unique touch to your Mother’s Day gift.
To create this, you’ll need a rose sheet, purple popsicle sticks, a purple marker, sketch pens, ribbon, a paper cutter, and double-sided adhesive. Cut the rose sheet into a square and stick the popsicle sticks on it with the adhesive.
Paste another rose sheet on the other side. Now, write your favorite quote on both sides and decorate it with sketch pens. Use the paper cutter to cut the paper with a two-popsicle-stick gap on each side.
If you cut from the first gap on one side, make sure to start from the second one on the other side.
Love To Pieces – Puzzle Card

Image Source/Tutorial: 123Mytoddlerandme
This is such a clever idea and is a great fit for children ages 5 to 10. You will need some popsicle sticks, red paint, puzzle pieces, a marker, glue, and string. Glue the popsicle sticks together and draw a heart shape on them.
Now, paint the puzzle pieces red and stick them randomly inside the heart. Write your favorite quote with the marker and glue the string onto the back. Your awesome card is ready!
Flower Pop-up Mother’s Day Card

Image Source/Tutorial: Made To Be A Momma
Handmade cards are one of the best ways to show someone special you love them! This Mother’s Day card is totally adorable and also incredibly easy to make. It’s just right for pre-primary children.
All it takes is some cupcake liners, white cardstock, medium to large buttons, green popsicle sticks, green foam, scissors, and glue. Divide the cupcake liners into three portions.
Cut one portion liner by half an inch and another by one inch. Glue these liners over each other by size and stick a button in the middle. Add the popsicle stick and green foam leaves to finish your flower.
Coffee Cup Card

Image Source/Tutorial: The best ideas for kids
To make this cute card, you’ll need green popsicle sticks, buttons, cupcake liners, white and pink cardstock, and gold letter stickers. Draw a coffee cup on the rose cardstock and cut out two cup shapes.
Paste one cup onto a white sheet and the other one lined up with the handle of the first cup. Now, glue the popsicle sticks slightly inside the inner cup and attach cupcake liner flowers to the other end.
Add a button in the center of the flower. Finally, write quotes on both cups using the gold stickers.
Popsicle Stick Card for Mother’s Day

Image Source/Tutorial: Crafty Morning
Popsicle stick crafts are always a good time! Every preschooler I know absolutely adores a good popsicle stick project. To make this one, glue popsicle sticks in the shape of a house onto yellow cardstock.
Next, cut a heart out of a pink card and paste it right in the center of the house. Glue some buttons over the popsicle sticks and write your special message with markers.
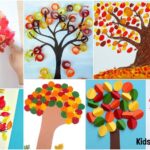
DIY Flowers for Mom with Popsicle Sticks
How To Make a Photo Flower Craft

Image Source/Tutorial: J Man And Millersburg
This is such a sweet keepsake! You’ll need at least three different colors of popsicle sticks. Cut the head out of a child’s picture.
Then, cut some cardboard into a small circle and paste the photo head onto it. Cut half of the sticks in half, and the others a bit shorter than those. Glue these onto the cardboard to form petals.
Now, attach a full popsicle stick to the back of the flower to create the stem. Take a small jar and fill it with tissue paper to place your flower inside.
Painted Flower Canvas Art Project

Image Source/Tutorial: Plaid Online
This art project is awesome for kids aged 5 to 10. Grab an art canvas and color it with tangerine paint. Paint 15 popsicle sticks blue and two of them citrus green.
Cut the blue sticks about a third of the way down. Make a circle on the canvas with the longer blue sticks and then glue the shorter ones over them. P
aste a green stick on to form a stem and cut the other green stick in half for leaves. Glue a ribbon inside the flower and a button in the middle.
Dip a brush in white paint to create polka dots on the canvas. Finally, glue a ribbon at the outer edge of the canvas.
Felt Flower Craft For Kids

Image Source/Tutorial: Crafts With Lisa
These popsicle stick flowers are so simple and are a great project for ages 5 to 10. Start by cutting a flower shape out of felt. Add a cupcake liner and the popsicle stick to the middle of the flower.
Next, twist a pipe cleaner into a circle and glue it in the center of the flower. And just like that, your flower is ready!
Handmade Coupon Bouquet Craft for Mom
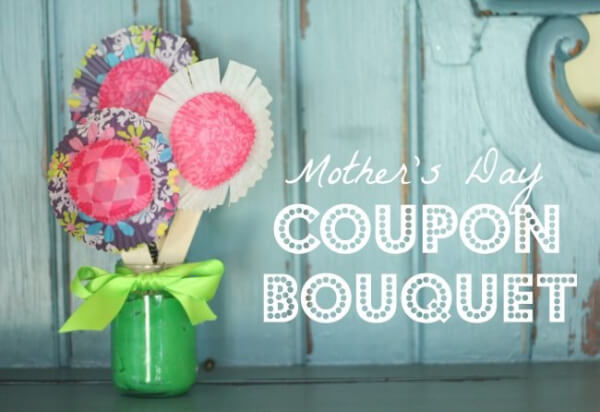
Image Source/Tutorial: I Can Teach My Child
What a perfect gift to show some love to your mom and have a great time with her! This activity can easily be done by a preschooler.
To make it, glue a regular-sized cupcake liner onto a popsicle stick. Then, paste a mini cupcake liner on top of that to complete your flower.
Write your phrases or “coupons” on the stick with a marker. Place all of your finished flowers into a small jar.
Popsicle Stick Flower

Image Source/Tutorial: The Exploring Family
This is a fun one for kids from 3 to 6 years old. It’s an easy way to make handmade flowers with just a few simple materials.
Cut heart shapes from rose construction paper and leaves from green paper. Glue four heart shapes at 90-degree angles to each other onto a popsicle stick to make the flower.
Add two leaves to the stick. Glue a rhinestone right in the center. Your beautiful flowers are all finished!
Flower Pots Using Popsicle Sticks

Image Source/Tutorial: Typically Simple
If your mother loves gardening, this is a total showstopper! This easy-looking popsicle stick flower pot is great for children of all age groups.
All you need to make it are some popsicle sticks, paint, a rubber band, soil, and ribbons. Color the popsicle sticks in your favorite colors and then form a circle by tying them together with a rubber band.
Tie a ribbon around the sticks and add some soil to the bottom. Your flower pot is ready!